The war in Sudan 1884

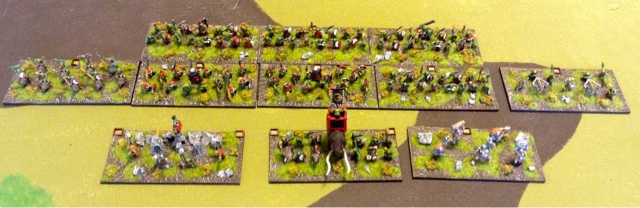
We played our first game of the Mahdist War in Sudan 1882 - 1898 using Blackpowder rule set. We fielded approx 1000 points a piece as that's all the British I have at the moment, but it was more than enough units to play a fair sized game. We kept the game simple. At one end of the table was a town which the British column had to capture/occupy as a settlement to set up camp, the town appeared to be deserted but reports from British scouts had suggested sightings of small groups of Mahdist cavalry. The British column would advance on from the opposite end of the table. All Mahdist troops were either hidden behind the hills of the dessert or were off table where they would enter the table at random sections of the table. I elected to have the command of the mahdists and my dad took control of tne British expeditionary force . The road for the British was to about to prove very Hostile indeed..
With the Hussars and Guard Camels ahead of the column the British and Eygptian infantry March along the track towards the town accompanied by the Artillery.
The mounted infantry reconnaissance the hill to the columns left where all seems quite until out from the bright light of the sun a dust cloud appears revealing...
A full brigade of Baggara cavalry. I managed to roll a 5 on the random deployment at the start of my turn which meant the cavalry would appear just behind the hill the mounted infantry had scouted, the Baggara cavalry made a beeline straight for the British cavalry.
As the 19th Hussars scout ahead of the main column as the Guard Camels and 10th Hussars (far in picture) head towards the right flank of the town up ahead. With the arrival of the Baggara cavalry The 19th Hussars are ordered to return to the main column and drive off the Mahdist cavalry.
As The column of British troops had started to march up the track and the camel mounted guards were heading towards the town quickly I sent my Mahdist artillery to the top of the hill which it had been hiding. I hoped that the gun would at least slow the advance of the guard with some well placed shots, well who was I trying to kid! As a succession of cannon balls widely missed their target.
Mahdist infantry now arrive and with a roll of a 6 I was able to choose where they entered. I put this brigade of infantry in the corner of the table where my cavalry had arrived and after failing to move due to a failed command move they were still in a good position to threaten the rear of the British column.
With the threat of the Mahdist cavalry the Yorkshire/Lancaster battalion and a Eygptian battalion broke from the column and deployed in line to face this new threat. The Blackwatch moved from the track in support. The combined fire of the Yorkshire and Eygptians managed to shake a unit of Mahdist cavalry.
With the 19th Hussars back to support the infantry and an artillery piece deployed the second brigade of infantry headed by the Gordon battalion along with the navel and Eygptian battalions and in the rear of tne column tne Kings royal rifle battalion continue at a slow pace towards the town.
The mounted infantry had failed their command roll and as a result were charged by a unit of armoured Mahdist cavalry. Although they managed to draw the 1st round of the combat against the odds they were to be broken in the following turn. Not only that but the supporting Eygptian infantry didn't like what they saw to much and downed their weapons and ran away (true to history). These two routs had left the Blackwatch dangerously exposed and despite been nearly shaken I couldn't miss the opportunity to charge the scots in the flank as my cavalry over ran into them.
Despite the flanking Attack the Blackwatch held their nerve and checked the Mahdist attack after both units bacame shaken meaning morale checks for both sides. The Baggara cavalry brigade was now broken, however the Blackwatch (as aare all the British) have the steady rule and auto pass the first morale check so held there ground. Despite the Mahdist cavalry retreating the scots were now in danger as the Mahdist infantry was fast starting to approach.
The Mahdist infantry of the Blackflag fast swarmed towards the scots, although I fell just short in an attempted charge. However With my pot shot firing from the Rifle armed Mahdists Warband and Benja skirmishes I managed to cause a morale check and with a dreaded double 1 roll the Blackwatch turned tail and fled much to the delight of the rather Surprised Mahdist riflemen!
While the Blackwatch fled (yes I felt it was worth repeating again Lol) the Mahdist camelry arrived on the same area as the cavalry brigade had and tried to make a dash for the hill towards the town as they had arrived right in front of the Royal marine infantry and deployed artillery.
With the threat of the Mahdist cavalry now gone the Yorkshire Batallion turnred to face the on rushing Mahdist infantry of the Blackflag. However despite firing at point blank range the casualties were few on the mahdists, a result due to my dads poor shooting dice and my good morale saves. The British artillery also left a lot to be desired. In the background the Kings royal rifles engage the Mahdist riflemen.
After chasing off the remains Baggara cavalry the 19th Hussairs rallied as the navel brigade and maxim machine gun deployed to cover the rear of the advancing British column.
As a result of their poor firing the Yorkshire unit are chargers in the flank by a screaming Mahdist war band. The Poor Yorkshire/Lancaster unit is beaten in the combat and having already used there steady rule due to the Mahdists terrifying charge rule my dad rolls poorly on the morale test and another British battalion is routed. The 1st Britsh brigade is broken as only the Royal Marines are left from this brigade.
As the Royal Marines turn to face the Mahdist infantry as they start to retreat I order a follow me onto the Mahdist camels to charge the rear of the Marines. Despite my sucess I am beaten in combat and actually shaken in the process, at least the Royal Marines were not going down without a fight.
Futher ahead of the fighting the guards camels finally reached the sumit of the hill on the right hand side of the town were they were met with the sight of 3 Warbands of dervishes. The Guards quickly dismount and unleash a volley that disorders a Warband unit as the 10th Hussairs charge into another. The dervishes despite been shaken hold there own against the Hussars thanks to some more poor dice rolling from my dad and win the combat thanks to the supporting Warbands,the hussars are forced to retreat from the combat but what was to prove costly is the fact that they were shaken.
The Eygptian infantry and the Gordans advance towards the town and as they advance they manage to shoot and silence the rather ineffective Mahdist artillery who decide they have had enough and abandon the artillery.
As the Gordans and Eygptian infantry advance to the town the remaining Mahdist brigade of infantry reveal themselves behind the hill on the left flank of the town.
The 19th Hussars attempt to charge the Bennja skirmishes who have been a real nuisance to the British infantry but they fail to reach as their command roll only allows them one of the two moves required.
The Madhist infantry of tne Whiteflag head towards the town as the Camels take refuge behind the hill line to shelter away from the British infantry so rifles.
As the Maxim machine gun fires its rounds into the Mahdist infantry ( my dad managed to jam the MG on its first ever shot, such was the kind of luck my dad was having) at a slow safe pace, the 19th Huusars are hit by the Bennja riflemen and become shaken. With the 10th hussars shaken and the mounted infantry destroyed the Cavalry brigade is broken and with this the British army has passed its break point to.

The British advance has been stopped and the remaining troops are forced to start to retreat from the battlefield handing the mahdists force its first victory in our very first outing. It must be said my dad rolled some outrageously bad morales and his shooting was just as bad no more so than when the famous Blackwatch Batallion broke after a fire fight with a Mahdist warband and Bennja skirmishes. He managed to roll very few 6s so my troops were hardly effected from becoming disordered. This enabled me to get to close quarters were my Mahdists troops stand a good chance of defeating the British especially in the first round. For our first game with this period I think we managed to capture the period feel pretty well as the sight of masses dervishes appearing from behind hills unexpectedly and the random arrival points of the Mahardist troops added a suspense to the game for both sides. However I don't think the British could shot as badly again in a game, maybe it was a sandstorm wiping up around the battlefield that obscured their sight or sumit, anyhow the town remained in Mahdist control for the time being anyhow, and The British were left licking their wounds. I'm sure the press reports been sent back to Britain would not be well received in the morning papers :-)
The victorious Mahdist infantry of the White flag head towards the town.