Tuesday 24 June 2014

Macedonian v Indians


My Macedonians were given a run out on Sunday evening against their old foe my Dads Indian army. With my latest additions we could field a game of a 1000 points aside, way to much for an evening game but what the hell we decided to do it anyway!

I slightly changed my divisions around, mixing my companion cavalry with my medium and light cavalry  


My dad fielded his Indian Elephants in units with skirmishes supporting them for the first time


Indian light/medium cavalry and chariots in support of  the Indian infantry


The following photo is how my right wing cavalry division spent all the game bar the last move. After blundering their command roll on the first turn, the light cavalry and horse archers turned tail and retreated two moves never to return into play, the rest of the cavalry failed every command roll until the final turn
 

As much as I tried I couldn't quite get the right command throws to push my attack in the centre in a disciplined order and became somewhat bogged down with limited success.  My dad faired little better  struggling to get good command scores, I was starting to think buying us the new warlord games Roman numeral dice for our ancient games was certainly not bringing us much luck :) 


My left wing cavalry faired much better and after my light cavalry and archers softened up Indian mercenary Hopilites my Companion cavalry crashed home and broke the division swiftly 


Indian war elephants somewhat reluctantly head towards the massed ranks of Macedonian pikes, not that I would blame them


My first division of elite Macedonian Phalanxes battle against the Indian foot troops gradually pushing them back and putting that division on the brink of collapse, however I suffered to and lost my Hypastists through arrow fire, one casualty, morale throw of double one = Hypastists break pppssstt 
so much for been elite! Also one of my Phalanxes had become spent  in the melee phase meaning my division was starting to waver slightly.


Skirmishing in the woods.


With my right flank cavalry clearly not interested in taking part in the battle my phalanxes are flanked by the Indian left wing.
 

After becoming flanked and disordered by a lot of arrow fire their was little I could to do but brace myself for the impact of the Indian elephants which duly came and smashed my phalanxes  one after the other shattering my infantry division. Ouch


That turned out to be the last move, both my dad and I had lost one division each so all ended in a draw. As I mentioned earlier the game was to big to play to a finish in a couple of hours gaming time so next time we will scale it down abit, also those new warlord dice might be getting put on EBay if they keep behaving in the manner they did in this game for both sides  :-) 

Tuesday 10 June 2014

Fall of the Reich, End of the Rat race

                                                "Right boys this way to Berlin"


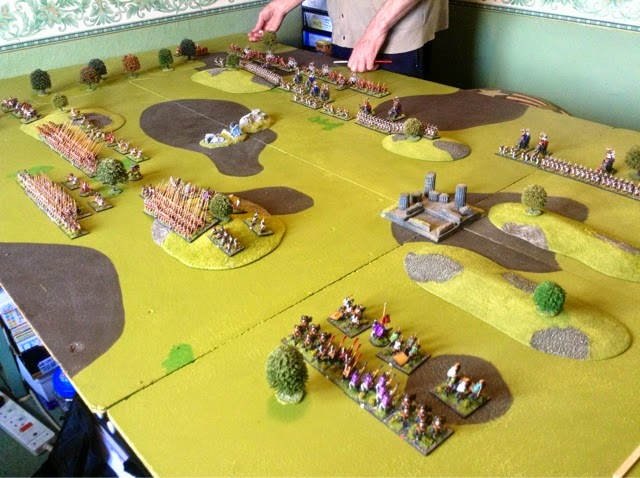
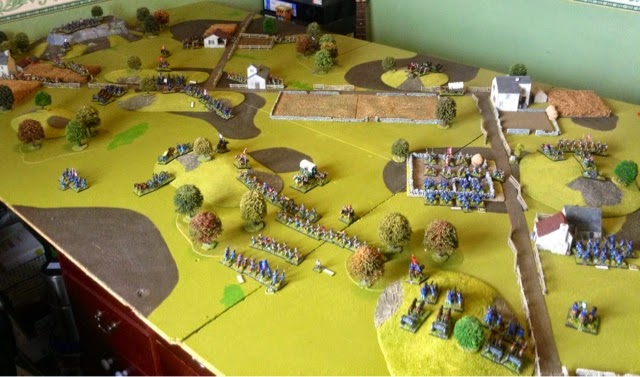
With my new American armoured Platoon finished and with the recent arrival of Fall of the Riech mdf morale chits I ordered we played a scenario out the Fall of the Rich book called The end of the rat race. The objective of the game is for the attacker to destroy the German Rear guard. The defender has set up a road block in the middle of the table on the road. A destroyed vehicle is placed on the road to represent the ambush been sprung onto the attackers Vanguard. my force was to arrive in column which enters from the table edge, I managed to start with 6 units on the road, D6 reinforcements will enter The game at the start of each turn, the Germans defenders entered D6 at the start of turn 3. The game was played at approximately 600 points patoon level, my Dad played the Germans and choose (from memory) a Volksstrum Grenadier platoon with HMG and Pak 40, Senior HQ, Ammo supply truck, Platoon Panzer IV H, Tiger I, HMG Nest, a minefield, two Target points, off table 105mm Artillery support and a forward observer and also for good measure a 88mm A/A gun. My dad started with 5 units on the table in ambush fire. 

The table at set up


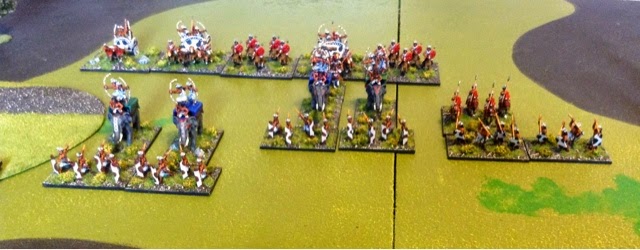
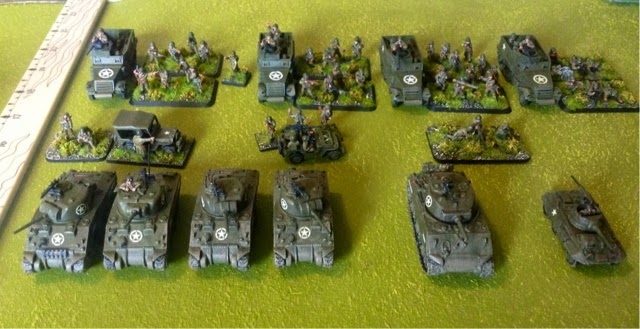
My American armoured force, Platoon of Infantry + M3 Half Tracks, HMG team, Forward HQ and Jeep and communication team, Reece team Jeep, 4 x M4 Shermans, Jumbo Sherman and a Greyhound armoured car and of table 81mm mortars. I also had a timed air strike set for turn 6 and a timed 105mm barrage for turn 4.


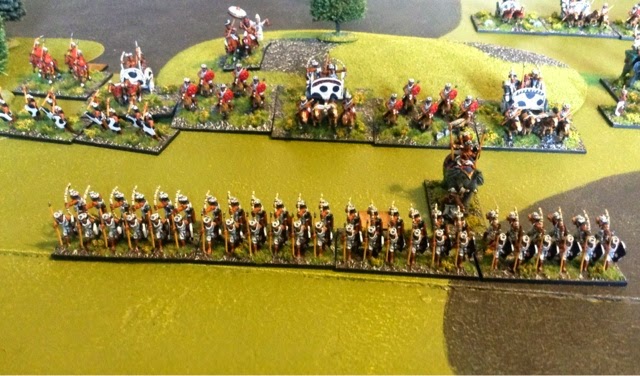
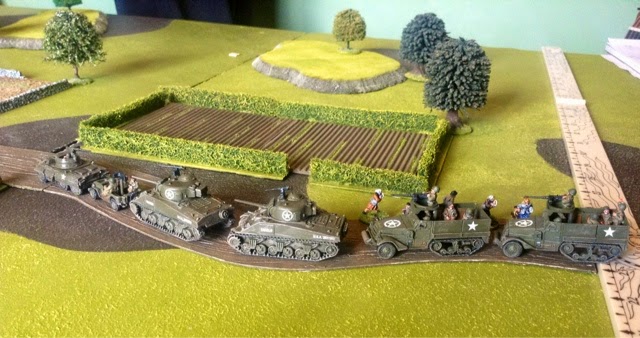
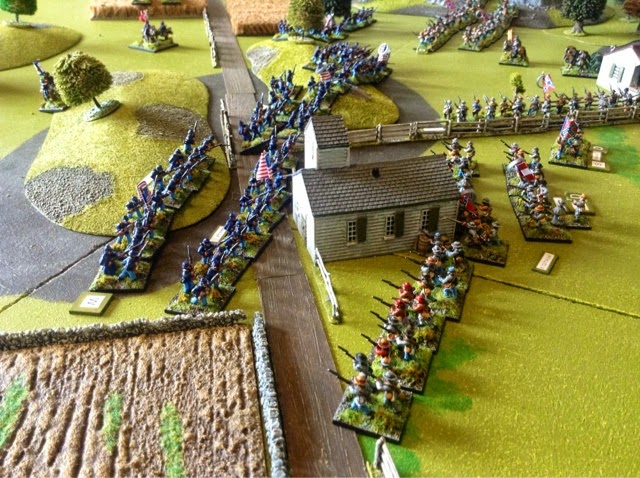
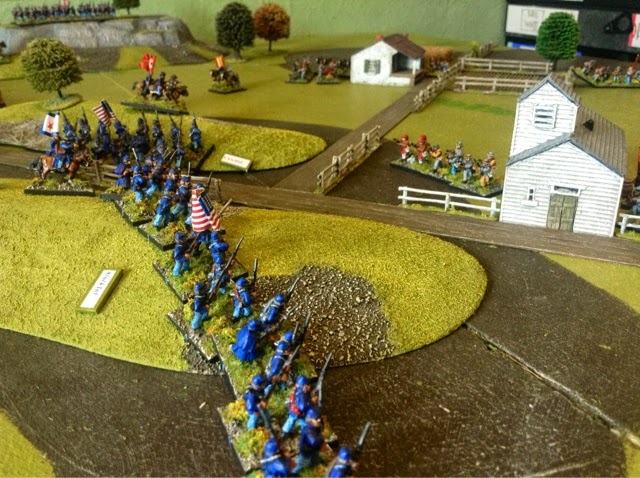
The head of my column enter the table, the Reece teams led the way followed by two Shermans and 2 M3 Halftracks and mounted Infantry squads.


A dug in 88 mm on the hill for a clear view readies itself on ambush to open fire onto the American armoured column.


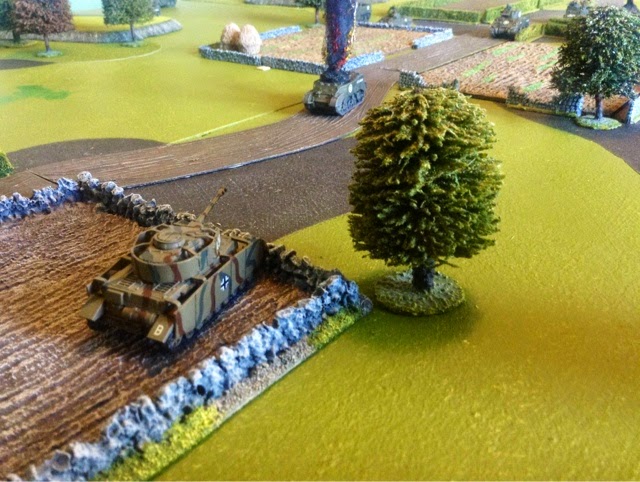
As my Americans spread out off the road one the Shermans became a early victim to the Panzer IV in the field near the road block, the morale chit was a high one which added to the two I had to take for the Germans holding both objectives at the start of the game put my BR up to 11 already. A round of 105mm artillery also finds its mark and pins the is mounted infantry and Halftrack .


The Panzer IV after knocking out a Sherman becomes involved in a long distance fire fight with two other Shermans.


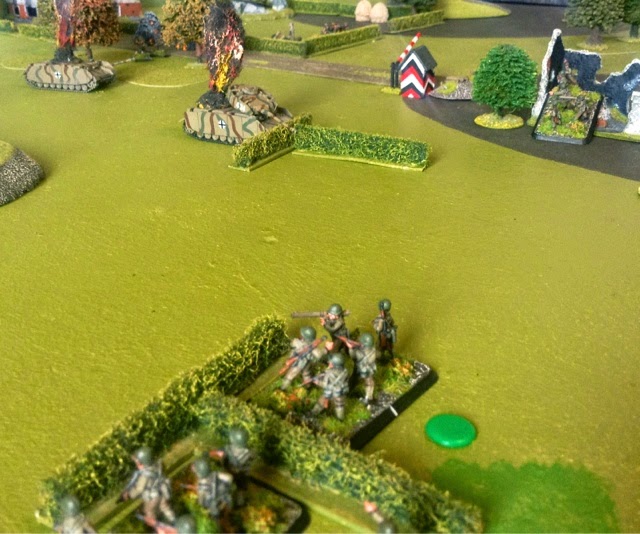
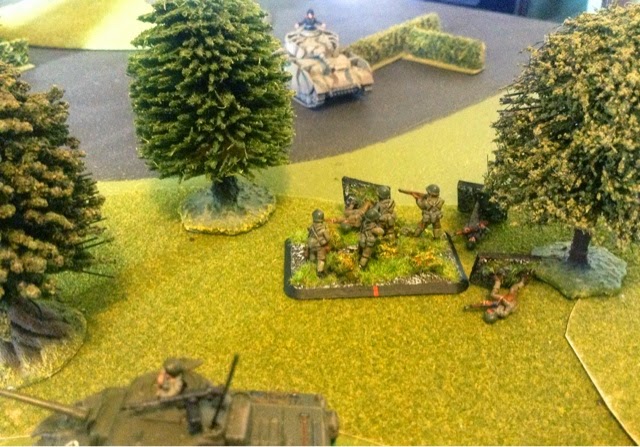
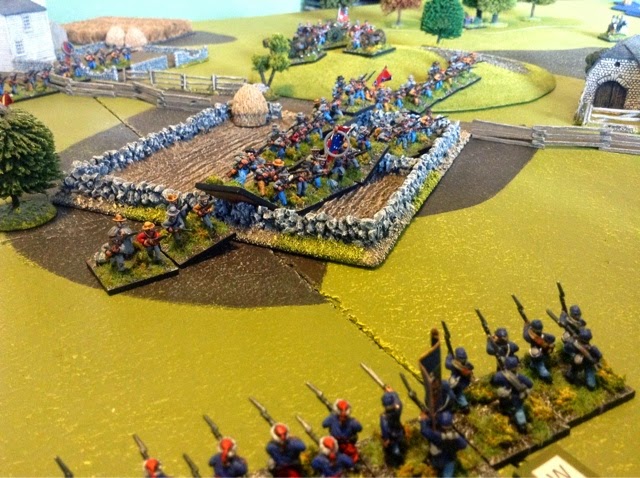
American infantry are given the order to dismount and run for the cover of the hedges across the field towards the German 88.


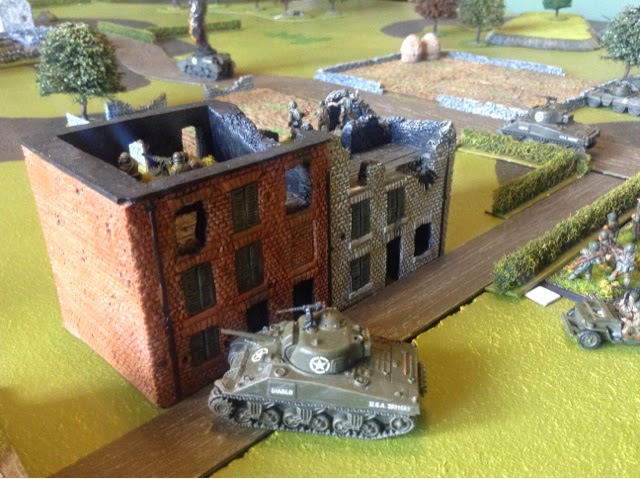
The HMG team takes position on the top floor of the building to give covering fire, I put it on ambush fire but over the next few turns I forgot about it! The recce Jeep team dismount and find a position in the building giving them a full view of the battlefield to call in the off table mortars.


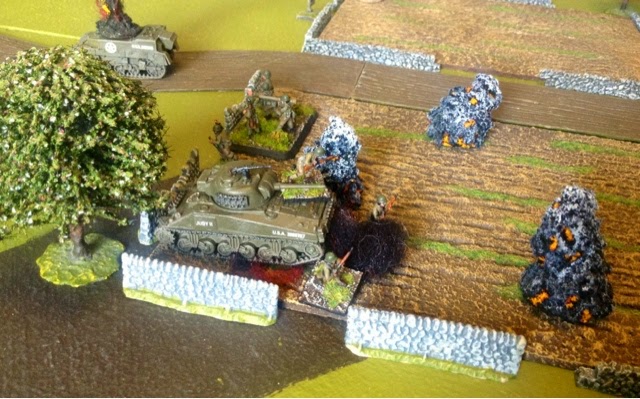
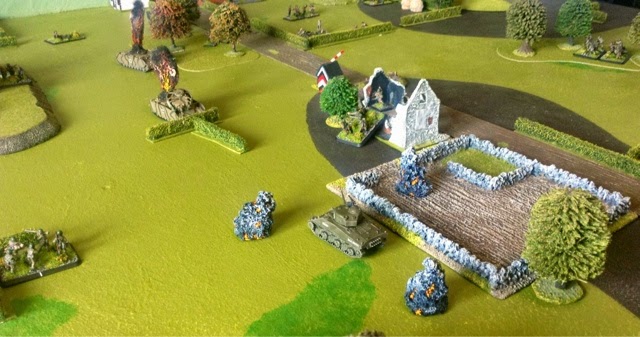
My dismounted infantry ran through the ploughed field to get In bazooka range of the Panzer IV with the support of a Sherman. The troops had ran straight into a pre targeted register point (PTRP) and 105mm shells rained in killing a couple of infantry men and pinned the Sherman. The Panzer IV then fired and hit the Sherman, although it didn't penetrate the armour I was forced to take a morale test which resulted in a 1, my tank crew had decided that enough was enough and abandoned the vehicle and ran!


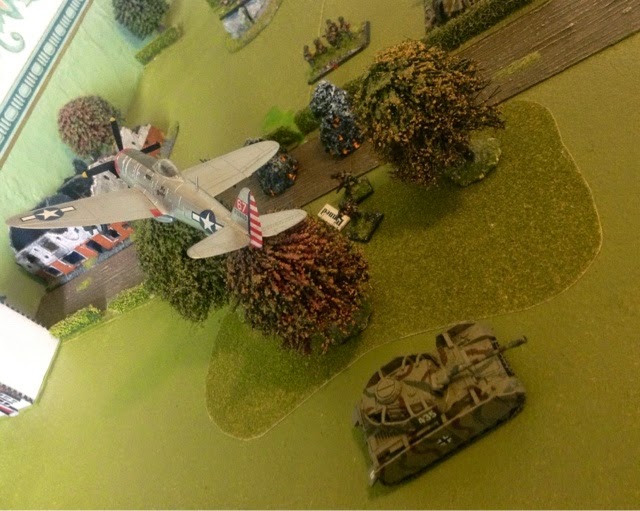
A much needed sight was the Thunderbolt dropping its bombs onto the German infantry in the wood, who suffered a direct hit and were destroyed meaning two morale chits to the Germans BR. The Panzer IV which had entered from reserve was lucky to be out of the blast radius.


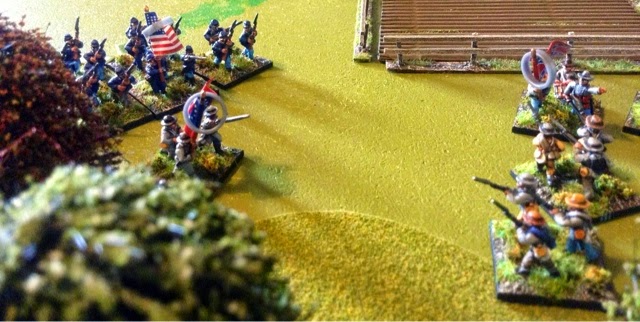
With half my armour on fire the infantry teams closed to bazooka range, a side shot onto the panzer IV hit and blew it up, the second Panzer in support also suffered the same fate shortly after from the Sherman Leader tank. My other infantry squad took the roadblock objective back from the Germans.
 

After crossing two mine markers which proved to be dummy minefields I forgot about the third and final minefield marker next to the road beside the field. Obviously this was the main minefield, and I rather rashly sent my Jumbo tank top speed down the road after both the Panzers had been knocked out to take the German road block position. My dad some what surprised by my move informed me i had just past through the minefield, Sure enough I rolled badly and set the minefield off and blew my Jumbo to bits, not the greatest debut! I managed to pull a aircraft chit but it didn't turn up in my next turn.


My dad revealed a second PTRP in the second field down the road and a shell direct hit my Sherman making short work of its armour and destroying it. My infantry squad in the ruined house near the roadblock are forced to flee due to heavy casualties from MG38 and rifle fire becoming pinned while under 50%


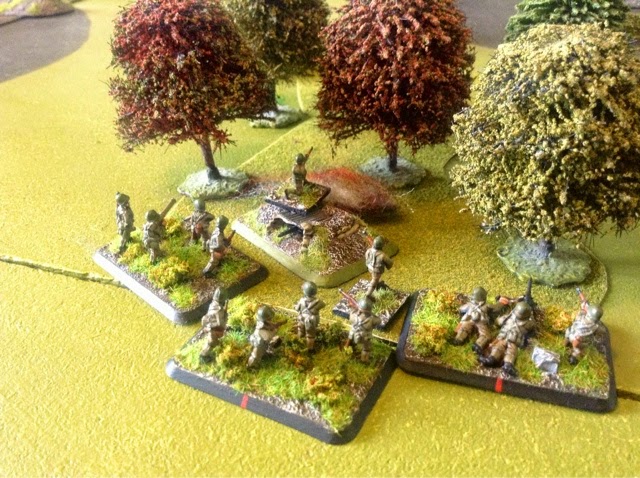
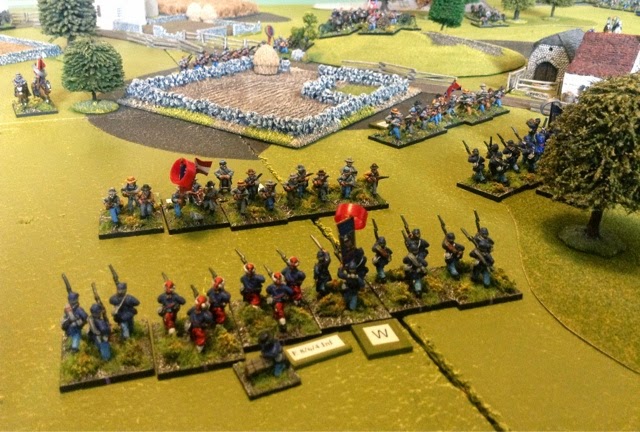
On my right flank my remaining infantry squads dismount and enter into the woods waiting on reserve move for the pre programmed 105mm strike to come down on the wood opposite them where the HMG nest was housed.


Boom...a couple of direct hits destroys he HMG nest and the American infantry quickly take the position using their reserve move in the following German turn.


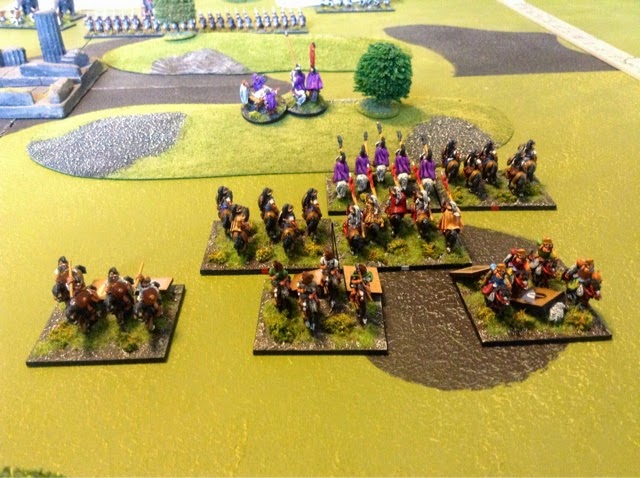
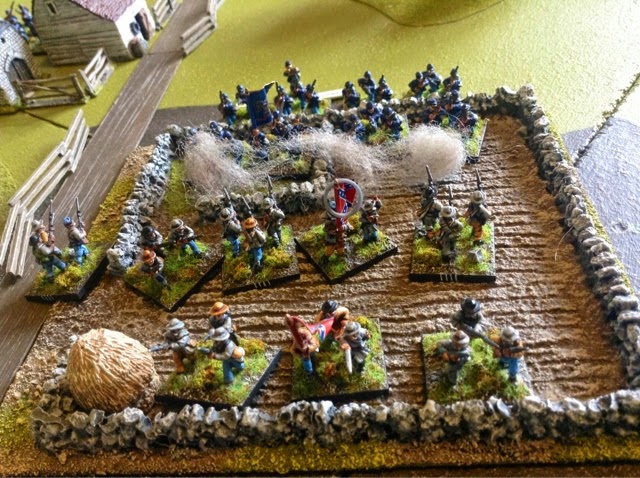
Seeing the danger to their flank the German Grenadiers take position behind the fields hedges with a LMG in support. The Pak 40 which had been quite over the last few turns was waiting on ambush keeping my one remaining Sherman hiding behind the wood.


after Knocking out the Panzer IV the infantry squad turns its attention to the 88mm and after pinning it with area fire for a couple of turns with area fire they open up with direct fire killing all the crew despite the fact they were dug in.


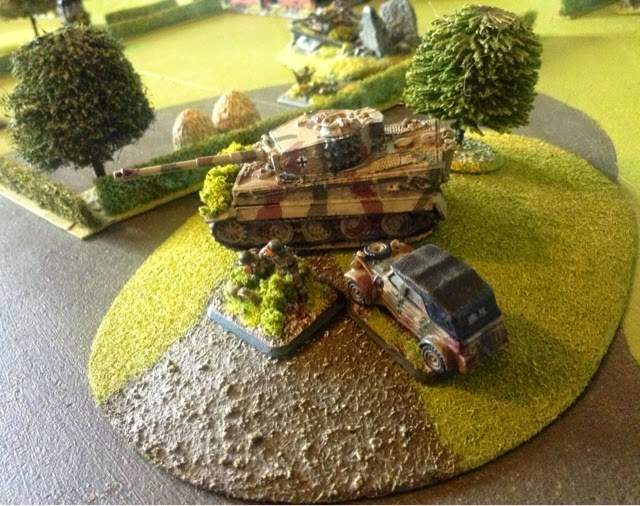
The Tiger 1 enters from reserve and perches itsself on the hill near the Forward observer team covering the wood in case the remaining Sherman command tank made a dash for it


 A Panzer IV moved down to the wood and opened up with MG fire on my infantry squad who had over run the HMG nest destroying them after they failed their morale test. I pulled a 5 for the  morale chit! I targeted the Tiger with mortar fire but my co ordinations were well off the mark and missed wildly.


The final turn,what was left of my infantry platoon were now in a position were they could not advance without coming into mg fire and my sole surviving Sherman was stuck behind the wood with a Tiger waiting for it to appear into view. My Dad also just consolidated his remaining troops and with time almost up we decided to call it a day. With no out right winner A quick tot up of the points saw the Germans take a tactical victory by a couple of points 26 to 24. The last chit I pulled had lost me a tactical victory and my Dad had managed to pull low chits all game and avoided all those nasty out of fuel markers and low on ammo chits etc which would make life even harder for the German defence. 
This day though the Germans had just about done enough to hold the American advance up for a little while longer.


Sunday 8 June 2014

Macedonian reinforcements

A few weeks back I was giving a mauling by my dads Indian army so I had to get a few more units to bolster my Macedonian ranks. You really do need to protect your phalanxes flanks so I got my dad to pick me up a few packs of light infantry and skirmishes from Magister Militum when he visited Triples at Sheffield as I was unable to attend. I got 2 units of Greek Peltasts and 2 units each of Thracian slingers and javelin skirmishes. Here is how they look with a lick of paint, I'm really pleased with how they have turned out and my dad has customised them by turning a few heads and weapons at different angles to give them some more character. Hopefully they will preform well when they come under a hail of arrow fire :)


Saturday 7 June 2014

ACW Encounter

I've had a week off work so we ran a afternoon ACW Fire and Fury game during mid week. The confederates started the game with one division on the table and three in reserve, the Union would start with all their 4 divisions entering from the table edge. All over the battlefield the major hills and buildings if controlled would be added to your final victory points, claiming objectives in your opponents half of the table would be higher in victory points. I took control of the Confederates and rolled on the events chart, rolling a 1 meant that my first division would be stuck in camp until I could roll a 9 or 10 (d10) meaning possibly they might not turn up at all. The Union roll saw them gain a captured gun for their force.

I deployed my first division across the center of the battlefield in the fields and across the hills of the valley, from turn 2 my second division entered from the right side of the table and my cavalry on the left as this was hampered with difficult terrain, so I planned to dismount in the rocky areas and at least slow the advance of the union right flank and maybe gain an objective. My final division of infantry who are delayed were supposed to enter in the center, so it was vitally important they entered sooner rather than later or the Union forces would overwealm my center in very little time.


Lucky for me my delayed division arrived on my very first roll and they wasted no time in running in column up the road to reinforce the thinned out Rebel center.


The Union troops advance in good order towards the rebel centre and the Valley.
 

Pickets division arrive on the right flank at the start of turn 2 pushing forward to meet he Union forces heading for the large hill.


The Unions start their main attack against the valley, committing 4 brigades against the Reb forces on the hill tops. A secondary attack goes against the field on the Rebel left centre.


The Union right flank under harassing Rebel artillery fire stumbles forward towards the farm houses.
My Dad also amasses a large amount of guns on the hill in support of the Union attack.


The first charge of the game sees the Union charge the hill, my Reb troops unleashed a deadly first volley but as a result they became low on ammo meaning my troops firing factors drop by half. The superior numbered union troops took full advantage of the situation and shook off their disorder and charged home.


Both Reb brigades were comprehensively beaten and forced to retreat well back from the hill, one brigade spent and the other worn. The Union troops took the ground just in front of the Rebel reserves at the church.


Seen the right hand side of the centre start to fall back I decided to launch a strong attack at my dads centre. Despite having a massive 17 factor because of the batteries on the hills behind supporting fire my dad rolled up a one so my elite Rebel brigades charged into combat unharmed.


The Rebels in the field had weathered the fire they had come under and with reinforcements now in support they advanced out the field to put more pressure on the Union centre.


The Union guns ready themselves as the rebels advance out the fields towards the union centre right.


A Union brigade breaks from combat in the centre and retreats back behind a hill, the over running rebel forces push towards the guns on the hill, staying out of canister range.


In the centre around the church both sides engage in a fierce fire fight


On my right centre to the right of the church one of my brigades somewhat surprisingly is broken and retreats away from the breaking through Union troops who's sweeping  advance takes them into my already battered brigade breaking them in the process to. The church was now held by only really one full strength brigade.


The Rebs charge out of the field into the union troops. The unions defending the wood hold their ground and repulse the Rebs, the second charge has better success as the union troops had already become low on ammo and are worn, the Rebs pushed the union back and took their ground.


On the union left flank my dad had managed to out flank Picketts division and had taken the high ground and had been unleashing fire down the Confederates flank with damaging effect until they became low on ammo. At this point I managed to rally the disorder from my supporting unit and charged through the disordered unit to get into combat with the iron brigade who had been taking heavy casualties during the game. I managed to push the iron brigade back and my brigades quickly took the ground and headed towards the buildings in the union deployment zone.
 

My sole brigade at the church takes the opportunity of charging a union brigade in the rear and breaking them, they followed this by sweeping advancing across the valley into a second union brigade but they ran out of steam and were repulsed, unable to reclaim the valley.


The union troops had taken control of the stone wall field to the Confederates left centre, in a final desperate charge the Rebs charged across the field but the union brigade fought well and with the defence of stone wall they pushed the Rebs back.


In the centre my conferate 2 nd division had taken full control and pushed the remaining union brigade back to their own base line. However they failed to reach with their final charge and only managed to contest the hill objective in the union centre.


Having repulsed the final confederate charge the Union brigades consolidate on top of the valley, the opposing confederate brigade worn and low on ammo retires back to the hold the church objective.
 

On the Union left Pickets division had stormed over the fields to take over the manor house objective as the Iron brigade retreated, the remaining Union brigade remained in control of the high hill objective on the left.

The final positions of the remaining troops. My Dad was in control of his right wing and held the farm house objectives, the Centre belonged to me as my division had broken through the Union troops and the Union left was a mixture of fortunes as both our forces had made ground and claimed objectives in each others deployment zone. It must be noted that at this point my Confederates had reached their army break point so my army was classed as worn and any future turns would have seen my command rolls at a minus one. Most of my brigades were now worn or spent and my dad although suffering heavy casualties to had a whole division still on the right wing basically at full strength. We totalled all our victory points for casualties/broken Divisions/KIA exceptional leaders and objectives and we found that we had both scored an equal mount of 26 points each.
Result draw...
I think this was a fair result in the end, up to the middle part of the game it really did look like my Dads Unions were going to turn me over, he had good success over the valley and my troops paid a high price, however a few strong charges in the centre helped swing the game back in the balance and despite some desperate last charges on both sides the game finished in a very enjoyable draw.